I recently found this brake tube tee with an integral pressure differential warning switch on eBay. I believe the original part number is 3404607. The original applications include 1970 and 1971 Plymouth Barracuda, Belvedere, and Satellite and 1970 - 1971 Dodge Challenger, Coronet, and Charger with 4-wheel drum brakes. The same type of part was used on other Mopar vehicles from 1967 - 1975. It's purpose is to detect differences in front-to-rear brake system fluid pressure. When a pressure difference exists, a plunger inside the brass body shifts position and makes contact with a switch, completing a path to ground and illuminating a warning lamp.
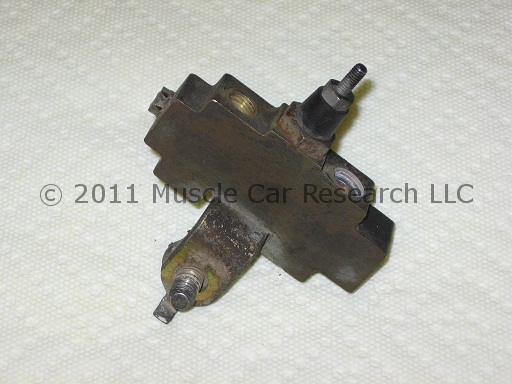
The brass body is marked with the logo of the Weatherhead Corporation and a date code. I decided to disassemble it to see if it's rebuildable. Follow along as I tear it down! Tools needed:
|
|
Step 1: Remove the pressure differential switch using the 5/8" box wrench.
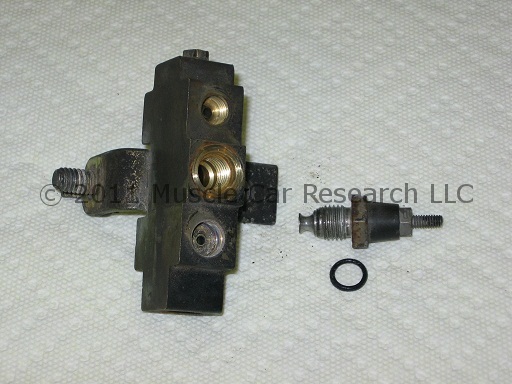
I discovered the first o-ring seal when I removed the pressure differential switch. A replacement for this seal will need to be included in a rebuild kit.
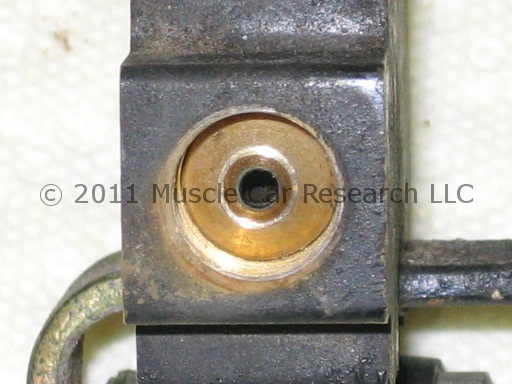
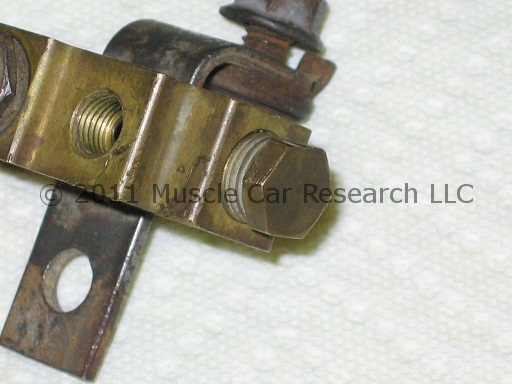
Now look into the hole where the pressure differential switch was. You should see a brass plunger inside the body. How can it be removed? If you don't have an air compressor you need to remove the brass seat at one end of the end of the body and the plug at the other end to gain access to the plunger and other internal parts. If you have a compressor you can remove the plug, block off the ports, and blow air through the hole in the seat to eject the internal switch parts. Be sure to "catch" the parts with a rag!
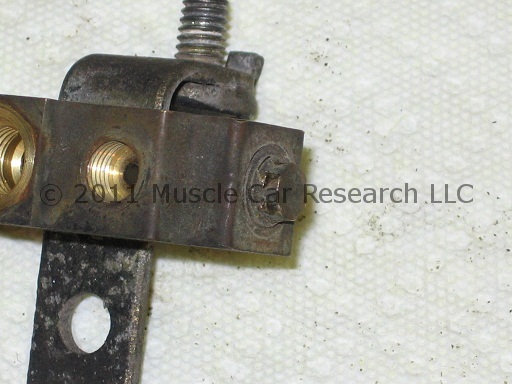
How can the seat be removed if you don't have a compressor? If you look closely at the seat you'll see that it is pressed into place. Look closely at the outer edges of the seat and you'll see that it's not cast as part of the body.
So how can the seat be removed? The best way to remove the seat without damaging it is to tap the opening with a 6-32 tap, thread a 6-32 x 1" puller screw into the hole, and remove the seat with a few twists of a wrench. Start by tapping the opening in the seat.
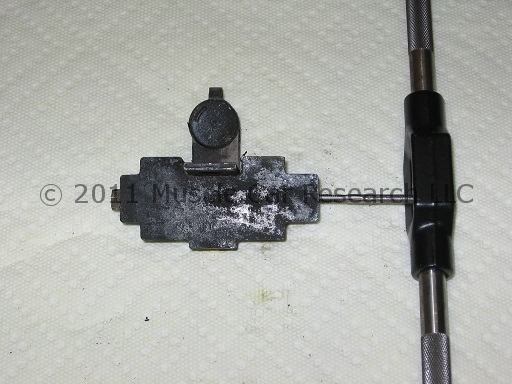
Here's the puller I made using a 6-32 x 1" stainless steel machine screw, a 6-32 nut, and a 1" washer. Thread the nut onto the screw. Insert the screw and nut into the hole in the washer. Thread the screw into the hole you just tapped in the seat. Turn the nut clockwise with an open end wrench. The seat will be removed cleanly and can be pressed in again when it's time to reassemble the valve. Muscle Car Research sells a puller tool if you'd rather not source the parts yourself.
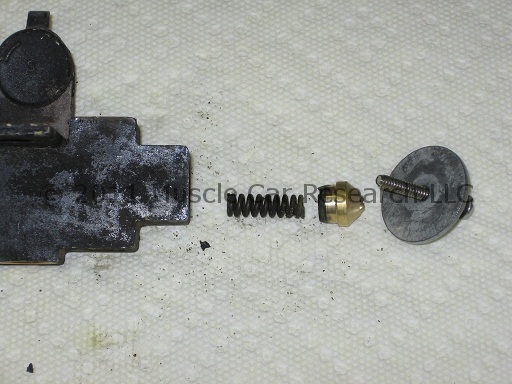
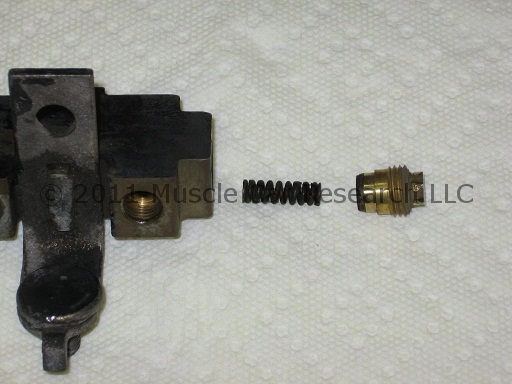
After removing the seat you'll be able to reach inside the body with your dental pick to remove a spring. Now turn your attention to the brass plug at the other end of the body. The plug will have either a 5/16" hex head, like this:
or it will have a 1/2" hex head, like this:
Remove the plug with the appropriate socket or box wrench. Be careful to not strip the soft brass hex head of the plug! You may need to tap the head with a hammer and/or apply heat from a torch to loosen the fitting if it doesn't turn with minimal force. After removing the plug you can remove a second spring.
Now you can finish removing the internal parts by gently tapping them out of the body with a nail set, screwdriver, or other tool. The plunger fits between two brass cups that are sealed with o-rings.
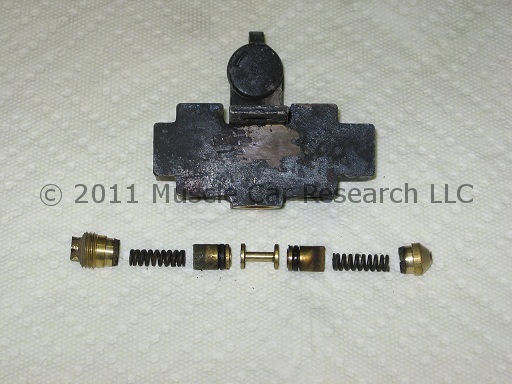
Note the two springs that work to keep the plunger centered when the brake fluid pressure is even between front and rear. These springs are intact and possibly reusable (if a little rusty), but I normally include new stainless steel springs in my rebuild kits for peace of mind. The o-ring seals on each cup will need to be included in a kit.
Are you interested in a rebuild kit for a valve like this? I'd like to hear from you. Please contact me to let me know that you're interested. It would also be helpful if you could tell me what you think a reasonable cost would be for a kit to rebuild this type of valve.
- Log in to post comments